Description
About this 3kg Kit
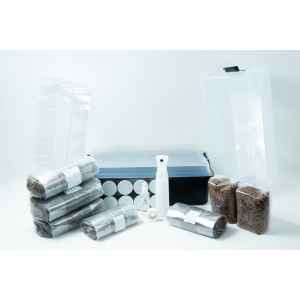
Complete Kit: Everything you need is included, just spray water and follow the simple instructions.
This kit uses a special Master’s Mix, a blend of sawdust, soy pellets, and water. It’s inoculated with about 300 grams of rye or millet grain spawn to give your mushrooms the best start.
We keep things simple and affordable by sending you a fresh, made-to-order bag, just like real mushroom farms use. No fancy boxes, no sitting in cold storage for weeks. This helps keep your cost down by $10; we pass that saving directly to you. We call these kits ‘almost ready to fruit’.When the block is completely white, put it into fruiting conditions.
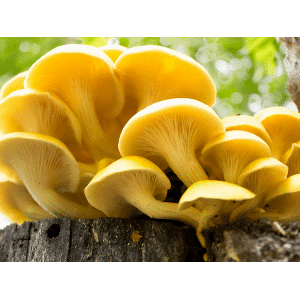
King Oyster mushrooms (Pleurotus eryngii) are known for their thick, meaty stems and large caps, which give them a rich, savory flavor that chefs love. They grow best when temperatures stay cool and steady, with humidity carefully controlled. Unlike other oyster mushrooms that grow in clusters, King Oysters form individually as tall “trumpet” shapes or crowns, often producing very large mushrooms.
The mycelium (the “roots” of the mushroom) colonises well at normal room temperatures (22–24 °C), but to make the mushrooms fruit, you need a cooler range of about 15–20 °C. Because they grow from the top of the block rather than in bunches, each block usually gives only one substantial harvests.You can try for second harvest with poor luck.
Humidity: Keep ~85–95% RH during pinning, then 80–90% as fruits expand.
Light: Indirect light is sufficient — avoid direct sun.
Air: Good fresh-air exchange (FAE) is important; If Co2 is increased, you get smaller cap, that is the look we want to achieve as the stem is what we chase with King oysters. That is why when you top fruit, leave a bit of plastic on about 5 cm from the substrate.
Storage: Keep colonised blocks refrigerated if you need to delay fruiting; harvested mushrooms are best used fresh or dried or freeze dried.
King Oyster Mushroom Grow Kit – Meaty
Pleurotus eryngii (King Oyster / King Trumpet) is recognized for dense, long-lasting fruit bodies with excellent texture for grilling, frying, and vegan “scallops.” Fruiting usually follows a cooler induction after colonisation; pins can appear within a week of putting into fruiting if temperatures are correct, and harvestable size is typically reached in 7–14 days depending on block size and conditions.
Step-by-step Instructions & Post-Harvest Care
IMPORTANT— King Oysters like a clear colonisation phase followed by a cooler, humid fruiting induction and reliable fresh-air exchange for best form and size. Sometimes when your whole block is colonised, white fluffy mycelium on top of the block may inhibit the formation of baby mushrooms, for this reason, we scratch the surface gently with a fork. This assists in formation of pins, you are only scratching surface to remove mycelium, not damaging the surface by severe scratching. Dont let your inner cat get clawing.
Step 1 – Let It Grow
*Take the bag out of its packaging.
*Stand it upright letting the mycelium breath from the white filter and do not cut it yet.
*Please keep it away from direct sunlight, windows, fans, AC, or a wardrobe.
Note: Full colonisation for king oyster blocks can take longer (2–4 weeks) depending on temperature — wait until the block is solidly white before inducing fruiting.
Need to Wait?
If you’re not ready to start fruiting after full colonisation, you can store the bag in the fridge for up to a month. Do not store it in the fridge until the bag is fully colonised(white).
Step 2 – Fruiting & Harvest
Once fully colonised(grown white), induce fruiting:
1. Initiate Pinning:
To trigger mushroom pinning, reduce the temperature to between 15–20°C. Also, increase fresh air exchange (FAE) to signal the mycelium that it’s time to fruit.
Preparing the Bag for Top Fruiting:
Since this is a top-fruiting setup, you won’t be cutting slits or X’s on the sides of the bag like with side-fruiting methods. Instead, you’ll cut the top of the bag open to expose the surface of the substrate.
Here’s how:
-
First, locate where the substrate ends inside the bag.
-
From the top of the bag, make a straight cut all the way around—but stop about 5 cm above the substrate, leaving a ring of plastic around the top edge.
-
This creates a “reservoir” for-retaining co2. This extra co2 is what helps us achieve the classic look of King oyster with long thick meaty stem and small cap, its the stem that we are after for king oysters.
Maintaining Humidity:
It’s critical that the surface of the substrate stays moist. Mushrooms won’t form if the substrate dries out. Aim to keep a layer of tiny water droplets on the surface at all times—this indicates proper humidity. Avoid over-spraying, as excessive water can cause contamination or hinder pin development. Since we are exposing the whole top area of the substrate, it also means more surface area for evaporation and chance of substrate surface drying out, this is why the kit is rated as Intermediate level.
2. Mist: Maintain humidity and mist the exposed surface 1–3 times daily as needed —Do not spray on baby mushroom when they form, there should only be tiny droplets of water at every time, not more. Do not let the surface dry otherwise it wont fruit.
3.Harvest: Mushrooms typically appear in 7–10 days. Harvest when caps are starting to curl upwards, exposing their gills., twisting gently at the base.
Flushes: blocks will give you one solid flush. Soaking between flushes can help recover moisture and will give you another smaller flush.
Common Mistakes to Avoid
Starting fruiting too early: King Oysters must be fully colonised or they will abort pins.
Low Humidity: Causes small, dry crowns — maintain high RH at pinset. You should have tiny droplets of water all the time on surface otherwise mushrooms wont pin.
Poor Air Exchange: Results in thin, elongated stems and poor cap formation.
💡 Tip: For large, restaurant-quality king oysters, use bigger, well-supplemented blocks and prioritise consistent humidity + cool fruiting temps — the texture will be worth it.
What to do if pins form inside the bag
Don’t worry. Just ignore the internal pins. Gently fold the top of the bag to push out excess air, cut a small “X” in the side of the bag (where you want the mushrooms to grow), and begin misting that spot daily. Mushrooms will start fruiting from that cut. The internal pins will eventually be aborted naturally, as they don’t have space to grow.
Checkout out our fine Misting Spray Bottle to produce tiny droplets and keep humidity high. The size of droplets formed can easily be evaporated , this constant evaporation signals mycelium to pin.
Want to Learn More?
This kit introduces you to Stage 3: Fruiting, the final step in mushroom growing.
To explore all three stages (including how mushrooms grow from spores to harvest), check out our
Educational Mushroom Growing Kit.
Checkout all the mushroom growing kits available in our Spray and grow 3 kg range.
Could not fruit the bag, or was it contaminated? Send us a photo or call us, and we will help you resolve the issue.